


Child safety straps are like personal bodyguards for your cupboards, keeping tiny explorers at bay with their clever design.
With these straps, parents can relax knowing their homes are safe havens for their little ones to roam. Easy to install and gentle on furniture, they're a lifesaver for busy families.
From the cleaning cupboard under the sink, to that forbidden snack cupboard, these straps provide an extra layer of protection letting kids be kids, while giving parents peace of mind. Safety never looked so easy!
Article Contents
- How to install the BABYGO® Child Safety Straps
- How to use the BABYGO® Child Safety Straps
- How to remove the BABYGO® Child Safety Straps
How to install the BABYGO® Child Safety Straps
Here's how to install them:
1. Prepare the surface by cleaning the area you wish to apply your locks to.
2. Adjust the length of your straps if desired (timestamp 0.18 seconds).
To do this, simply slide the cap on the right side of your strap, to the left (this is the side opposite to the BABYGO® logo). Then, push the strap through the cap, selecting the length you wish to make it. Snip the extra piece of your safety strap off using scissors, and push the strap back into the cap, clicking it back in place.
3. Remove the 3M adhesive stickers.
4. Apply the strap to your chosen place, pressing firmly on each end of the strap.
Top Tip:
Our straps reach maximum adhesion at 24 hours which in a nutshell, means 24 hours after they have been installed, the sticky 3M adhesive will be set and ready to use.
How to use the BABYGO® Child Safety Straps
Now you may be thinking, "that's great, but just because my little one doesn't know how to use them, it doesn't mean I do!" We are here to explain how to open and close your child safety straps with ease!
Wherever your safety strap is installed, it's important to know that the side with our BABYGO® logo is the side to open your strap. And the opposite side is the side to adjust them.
1. Simply slide the cap on the logo side of your strap in an outward direction, away from the strap.
For example, if your strap is installed horizontally with the logo the right way up, you should slide the cap to the left (like in the video). If it is installed vertically with the logo at the top, you should slide the cap upward. And so on and so forth.
2. Lift the cap away, releasing it from the strap.
3. To close, place the cap back over the strap and click back in place.
How to remove the BABYGO® Child Safety Straps
So, your little ones have grown up and perhaps are old enough to help clean the house (wishful thinking I know). Well, it's time to remove the safety straps from your cleaning cupboard.
Let me tell you a little secret...our child safety straps have the same 3M adhesive pads as our childrens cupboard locks. That means they can be removed in the same way!
To do so is easy.
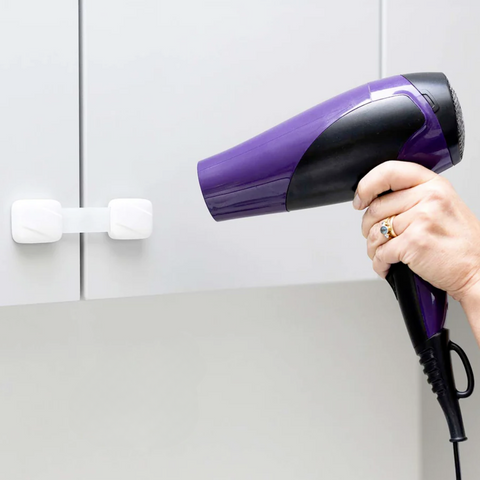
1. Apply a little heat to either end of your strap using a hairdryer, this will loosen the adhesive.
2. Be patient and persistent and start to gently wiggle the strap a little until it completely comes off.
3. Make sure you take your time and don't force it off too soon. This may cause some of the sticky pad to stay on your furniture - and we don't want that!
Top Tip:
You can also using floss to remove them! Simply apply it behind the adhesive pad and gently seesaw it back and to until it comes away from your furniture.
And there you have it! A complete guide on using our child safety straps. Whether you've got a cheeky explorer or a wandering adventurer, you now have piece of mind that your little one is safe.
Good luck!