Alternative Languages: German French Spanish Italian Dutch
Baby proofing your home is probably something you think "we need to do that" but then put off. Am I right?
Well we at BABYGO® have made it simple to install these small but mighty features around your house that are hidden to the naked eye. But they work wonders protecting your little ones from trapped fingers, bumped heads and nasty burns.
We have a small, but effective, child safety range and although some are simple to use, it still requires a little bit of brain power. We have created an installation guide for each one. Panic over.
BABYGO® Child Safety Locks
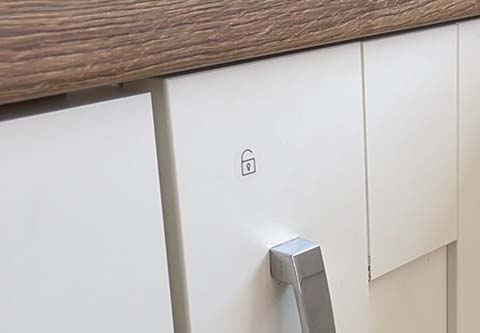
Little fingers try to get in every cupboard, drawer or door within their reach, so we've designed a simple way to put a stop to that. We have our Child Safety Locks, which don't ruin the look of your furniture, but keep little wonderers out.
What Do You Get?
In your box, you should have the following:
- 10x Child Cupboard & Drawer Locks
- 10x Cabinet Safety Catches
- 2x BABYGO® Magnetic Keys
- 1x Installation Tool
- 8x FREE Corner Protectors
- 10x Cupboard Stickers (Optional Use)
- 1 x Pack of Screws (Optional Use)
Installing Your Child Safety Locks
We have made protecting your little ones easy. But we all know that from time to time, things can be confusing, especially when using them for the first time. So, to make things even easier, we've made a video of how to install our Child Safety Locks.
How to Install Child Locks on Cupboards/Drawers:
Our locks can be installed on many different furniture types, you can see the video above for instructions on how to install on cupboards (timestamp 0:00) and drawers (timestamp 1:20). Also a reminder is our locks can also be positioned on cupboards in a downwards position if placed up higher in your house.
1. Prepare your surface by cleaning the area where the locks are being placed.

2. Take the applicator and place the lock and catch in position.

3. Peel off the sticker backing for the catch and place this into an upright/sideway or downward position depending on your furniture.

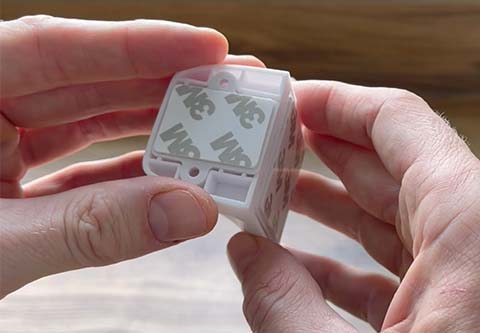
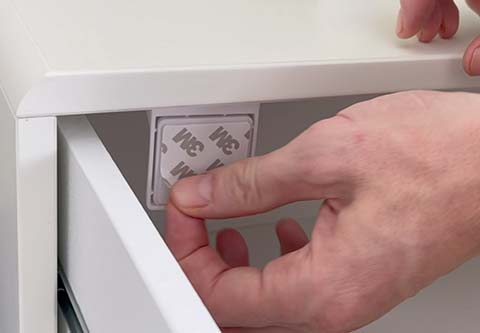
4. Then peel off the sticker backing for the lock, close the cupboard and apply pressure. Allow the 3M tape to bond for 5 minutes.

5. Open the cupboard/drawer and remove the applicator from the catch.

6. Apply pressure on the hook to enable the locking function, allowing this to hook onto the catch and lock the cupboard/drawer.

7. Use your BABYGO® Key to unlock the drawer by placing the lock infront of the drawer and move in a downwards motion.

8. You can use our optional lock placement stickers to allow you to target the lock when you need to open the cupboard/drawer.

💡 TOP TIP: Make sure you unscrew the mounting cap off the key to increase the magnetism of the key.
How to Install Child Locks on Cabinets:
Our child safety locks work on cabinets too, which is particularly helpful in your bathroom or bedroom, to save the trapped fingers. See the video above (time stamp 2.30) to see the installation process.
1. Prepare your surface by cleaning the area where the locks are being placed.

2. Measure the depth of the drawer front with a tape measure and lock this in place so you can use this as a guide on where to place the lock.

3. Take the applicator and place the lock and catch in position.

4. Peel off the sticker backing for the catch and place this into an upright position after you've measured the depth to show how far back it will sit.

5. Peel off the sticker backing for the lock, close the drawer and apply pressure. Leave the drawer to allow the 3M tape to bond for 5 minutes.

6. Open the drawer and remove the applicator from the catch.

7. Apply pressure on the hook to enable the lock, allowing this to hook onto the catch and lock the drawer.

8. Use your BABYGO® Key to unlock the drawer by placing the lock infront of the drawer and move in a downwards motion.

9. Use our optional lock placement stickers to allow you to target the lock each time when unlocking them.

💡 TOP TIP: Leave the locks to sit overnight before using them for added durability and for the adhesive to set properly.
BABYGO® Baby Proofing Kit
Want a little more added protection against other appliances and areas around your home? We give you just that. Our Baby Proofing Kit has been tried and tested by parents, grandparents and child carers and has been proven to be a success in keeping wandering hands out of those kitchen cupboards, ovens and even toilets.
What Do You Get?
In your box, you should have the following:
- 8x Child Cupboard & Drawer Locks
- 8x Cabinet Safety Catches
- 1x BABYGO® Magnetic Keys
- 1x Installation Tool
- 8x Corner Protectors
- 4x Safety Straps
- 2x Door Straps
- 1x Oven Lock
- 8x Cupboard Stickers (Optional Use)
- 1x Pack of Screws (Optional Use)
BABYGO® Safety Straps
Our safety straps are super handy for keeping little ones out of cupboards, fridges and toilets too. They are simple to use, once you know how, but at first they almost seem adult proof too. They're that good!
Installing Your Safety Straps
1. Prepare, clean and dry the surface you're going to be sticking the safety strap to. Leave the area to dry completely as this will affect the adhesion.

2. Peel off the 3M tape from both sides of the strap. Ensure the BABYGO® logo is facing the correct way before installing.

3. Place over the opening you wish to keep shut, press and hold for 10 seconds for optimal adhesion.


BABYGO® Oven Lock


BABYGO® Door Stops
Trapped fingers can be avoided and we've designed the perfect product to do so. Our door stops have a soft padded head which can avoid damage to your furniture, but also prevents the door from closing, stopping your child from having their fingers trapped. Also can be handy for those stroppy door slamming phases.
Installing Your Door Stops
1. Prepare the surface by cleaning the area the door stop is being placed. Always start with a clean and dry area.

2. Before putting the door stop in position, just check that the arrow is in this position as seen in the image.

3. Peel the 3M backing tape off and place against the door so the edge of the door lines up with the two raised bumps. Press and hold in place for 10-20 seconds to allow to adhere.

4. The door stop will be in action straight away and this will sit nicely between the door and the door frame, acting as a barrier.

5. To deactivate the door stop, you simply put pressure on the grey cushion end, either upwards or downwards, it will spin the full 180 degrees.

💡 TOP TIP: The door stop can be used in either direction your door sits. The logo may sit upside down, but the stopper still works efficiently.
BABYGO® Corner Protectors
How many times have you consoled your little one after a bump to the head whilst doing laps around the kitchen? We all know that moment all too well. But we have the solution - Corner Protectors. Who wants overly visible safety products? Not us!
We have designed the clear corner protectors for the mums who love the look of their vintage console table, but still care about the safety of their child too. Let’s protect your furniture as well as your little one, join us in 3 simple steps.
Installing Your Corner Protectors
1. Prepare your area by cleaning the surface is being placed. Always start with a clean and dry surface area.

2. Peel the 3M backing tape from the corner protector and place onto the corner of your furniture. Press firmly to allow the adhesive to bond.

3. And there we go, you're now protected against the never ending bumped heads, whilst still having a lovely looking home. It's as simple as that.

💡 TOP TIP: Our corner protectors have a larger circumference to ensure more of the furniture is protected. Oh and you're little ones of course.
BABYGO® Replacement Magnetic Keys
The vital part to our Child Safety Locks; the key. The piece that often goes walk abouts or is found in the most random of places. Luckily, we have replacements sets you can buy, so you can always have a back up one. This handy little key allows you to get into the cupboards you're keeping your little ones out of.
Using your BABYGO® Key:
We have designed our key with a mounting cap that features 3M tape, ensuring your key is out of reach of your little ones but easily accessible to you.
1. Peel the sticker backing off the key.

2. Place of a surface of your choice and apply pressure.

3. Unscrew the key from the mounting cap.

4. Use the key to unlock your cupboards, drawers and cabinets.

And once all the hard work is done, you can sit back and continue parenting. Gone are the days of relaxing I'm afraid. But you do have that peace of mind that your little ones won't be raiding the cookie jar or getting their hands on the bleach bottles anytime soon.
Best of luck with your cheeky explorers!


